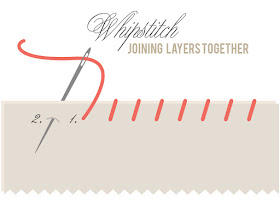
1. To begin, place your needle and knotted thread in between the two pieces of fabric (felt is used here because it doesn't fray) and up through the top layer of felt at point one.
2. Take your needle behind both layers of felt and sew through at point two. You will notice that the needle is at an angle, this gives the stitches the diagonal slant.3. Again bring your needle behind both layers of felt and sew through at point three.
4. & 5. Continue stitching until finished aiming for consistency in spacing and length of stitches.
6. You can also use the whip stitch to attach pieces side by side -just flatten the felt when done. It's like a stitch trick!
And here is a handy diagram:
Here we start at the right side of the fabric and move to the left. Constantly whipping the needle at an angle up from the front the the back. Up from one and back around through two.
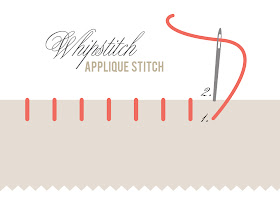
The second way to use the whip stitch is when attaching an applique or a shape to a piece of clothing or artwork. All the stitches are the same -but the angle of the needle is straight up and down. Here you will notice a piece of felt (my applique) on a linen backdrop.
1. Bring your needle and thread behind your applique and background and up at point one.
2. Go back down at point two right where your applique meets the background. You'll want to keep your needle nice and straight.
3. Come back up at point three.
4. Go back down at point 4.
5. Remember to keep your stitches evenly spaced -this will make for a beautiful applique!
6. Keep on going, practice makes perfect!
Again we start at the left and move to the right (but you can do what works for your project) coming up at one and back down at 2. This is one of my favorite stitches -it makes my projects come together quickly!
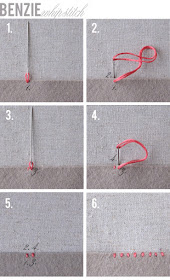
More embroidery basics by Benzie:
Backstich


Thank you so much for this tutorial! The pictures and the written instructions are incredibly helpful.
ReplyDeleteIt looks amazing, I am crazy about this blog and it works. Really its so good and i am very thankful to you. Invery informative and useful for me. Thanks for share.
ReplyDeleteHello! I love your patterns, I did a test run of this Rarity (to put on a fleece hat) but I ran into some trouble. It seemed as if the pattern shifted (the body outline) and the mane/tail had issues. I think it was something that was wrong with my fabric/stabilizer. Do you have any tips for embroidering on fleece?
ReplyDeleteHi Jenifer! Mmm, I haven't stitched on fleece before -I'm more of a felt fan, haha! I would definitely try changing a stabilizer or even securely pin down before sewing. Hope this helps!
DeleteThis comment has been removed by a blog administrator.
ReplyDeleteBeautiful work! I have never seen the techniques you use, but they sure add a lot to your creations! Thanks for teaching us a new way of doing adding color!
ReplyDeleteThis is darling. I haven't embroidered in awhile, but I'd love to try this!
ReplyDeleteLizzy
I love the ideas in this post - I have never thought of adding embellishment to ready-made clothes. What a great way to brighten up some of my old clothes. Thanks for the inspiration!
ReplyDeleteThis comment has been removed by a blog administrator.
ReplyDeleteEmbroidery stitches are the smallest units in embroidery. Embroidery patterns are formed by doing many embroidery stitches, either all the same or different ones, either following a counting chart on paper, following a design painted on the fabric or even working freehand.
ReplyDeleteCustom Embroidery Digitizing